Do you have certain armor parts (or props) that you have wanted to create for a long time but somehow just didn’t make yet?
For me that’s helmets! Helmets look SO COOL! But somehow I never made one before. It’s a bit daunting to be honest, to create something that needs to actually fit my head and ALSO look cool…
Perhaps you find the idea of crafting a helmet a bit scary too. But at the same time really interesting.
Well… Then I have good news for you!
Because I did the tricky work for you and created some very versatile helmet crafting patterns (in 3 different sizes!). And you can find the pattern set in my webshop right now 😀
-
Product on sale
 Helmet pattern collectionOriginal price was: €18.00.€15.00Current price is: €15.00.
Read more about how to use these patterns and create an awesome helmet for you cosplay or LARP outfit in this blog post.
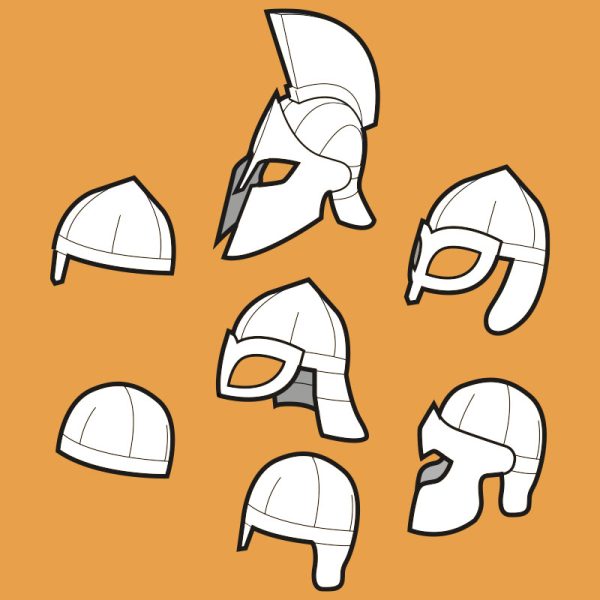
These helmet crafting patterns come in some basic shapes that can be used for so many different costumes and projects.
In the pattern set you will find 7 designs as examples. But when you mix and match the pattern pieces you can come up with so much more different helmet shapes. And of course you can add as much details to them as you want to create a truly original piece that reflects your personality.
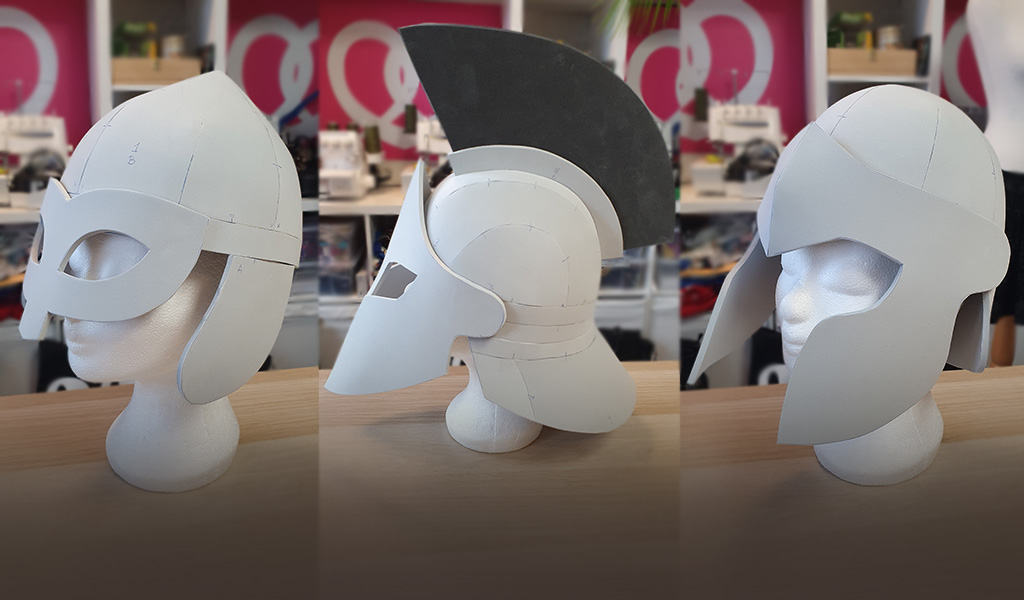
Want to make a Spartan helmet, Viking helmet or Knight helmet?
When you start working with this pattern set, check the first two pages of the PDF and decide which style (Spartan helmet, Viking helmet or Knight helmet) and which size (M, L or XL) you want to make and then print out the pages you will need for that type of helmet and that size. You really don’t need to print all the pages 😉
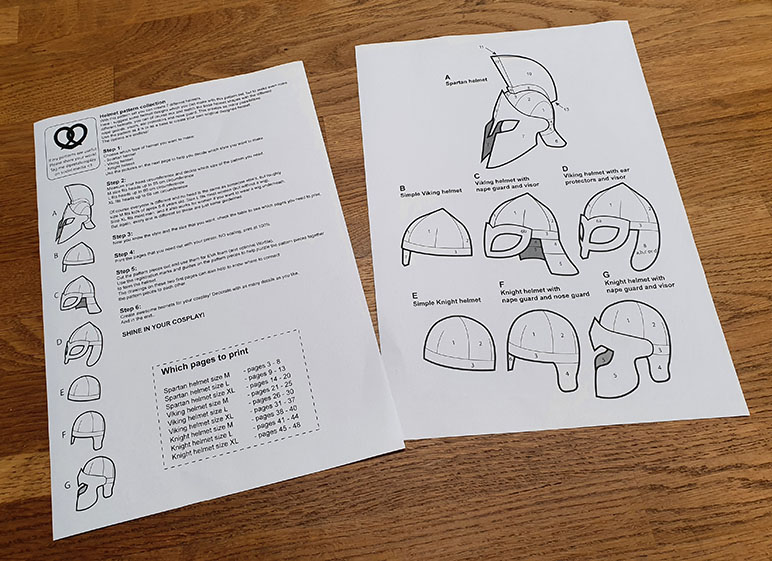
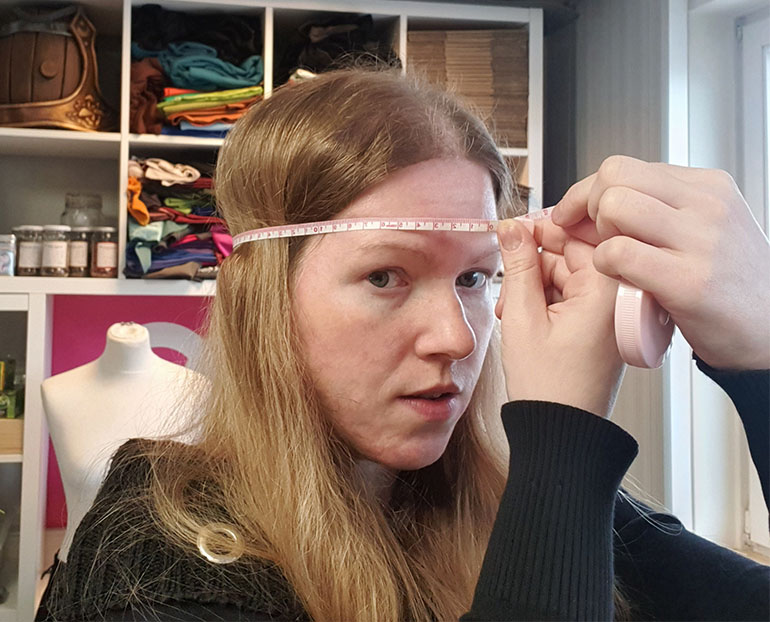
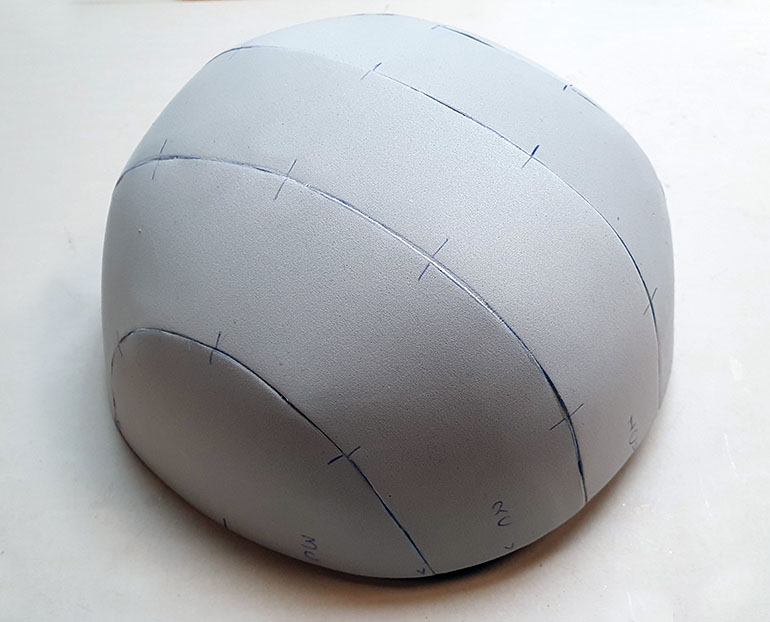
Choose the right size for the pattern
Before you even print out the pattern, measure your head first. This pattern comes in three sizes (M, L and XL) and it’s important to check first which size would fit you the best, so you won’t waste materials 😉
These patterns work great with EVA foam
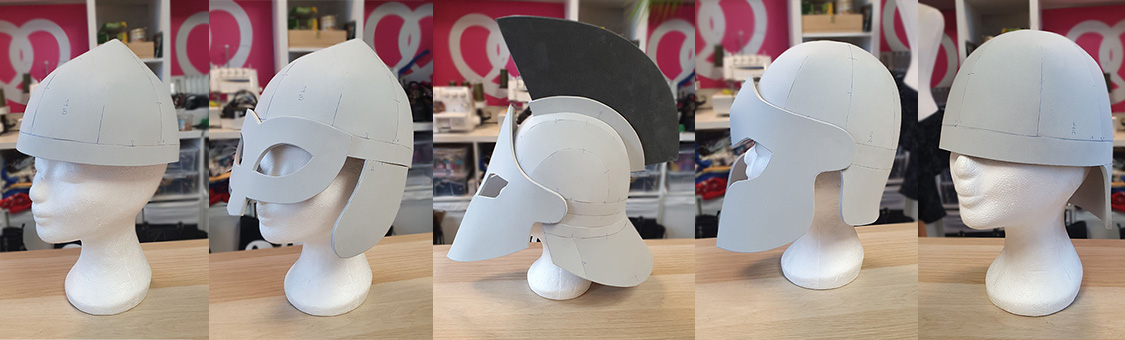
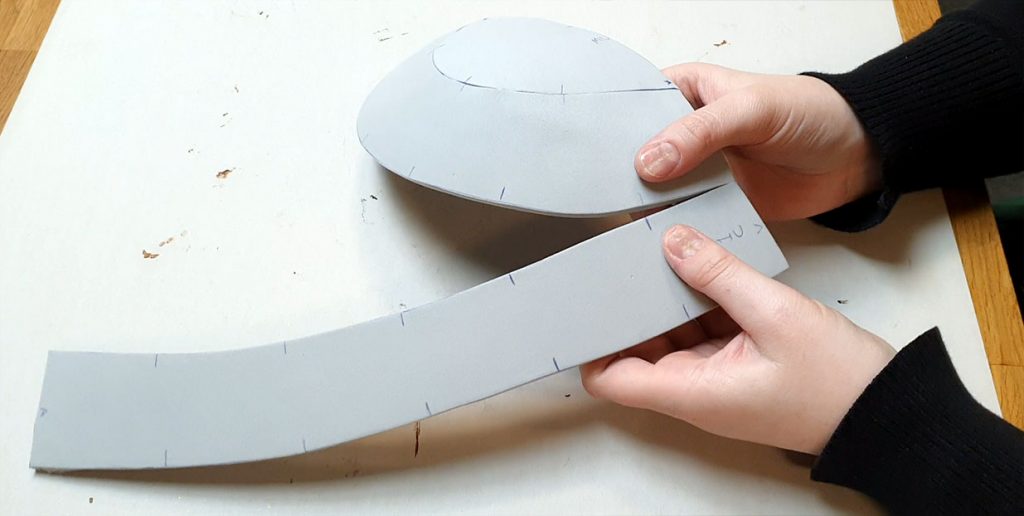
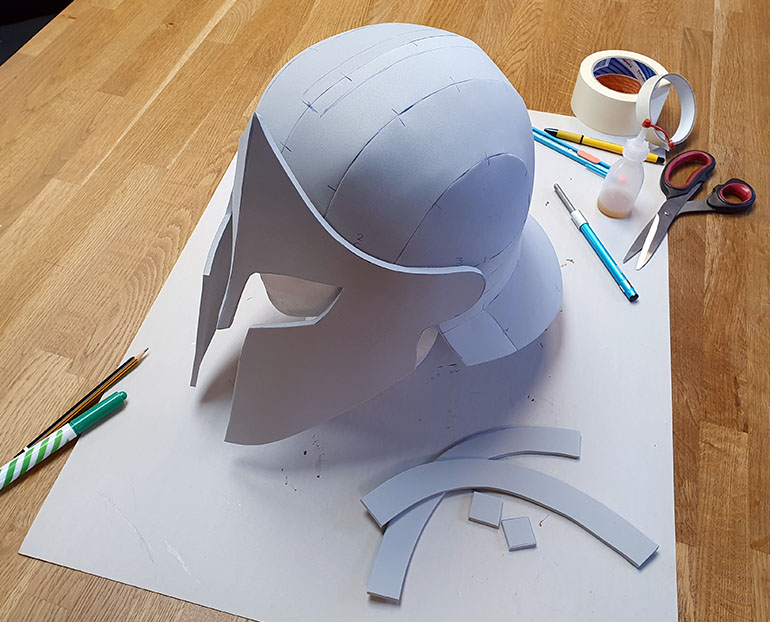
Now you know the right size and shape for the helmet, print out the pages you need and cut out all of the pattern pieces. Now you can transfer the pattern pieces you need onto EVA foam.
I recommend to use 5mm thick high density EVA foam to craft these helmets. This foam is sturdy enough for a helmet, but also still soft enough so you can shape it nicely round. In these examples I’m using the high density foam from Cosplayshop.be.
For the Spartan helmet it looks cool to create some texture into the ‘plume’ that’s on top of the helmet. I mean the mowhawk kind of thing. To make the texturing easier, it’s an option to use softer foam. Low density EVA foam is great for this! In this example I’m using the low density (CF65) from Minque-creative.com.
Always make sure to have sharp knife when you are cutting the foam. This gives clean edges which are easier to glue together later and give much nicer looking seams. I personally love to use my ‘pen shaped’ sharpener which I got on Amazon. (The link is an affiliate link)
Connect the pieces using contact cement
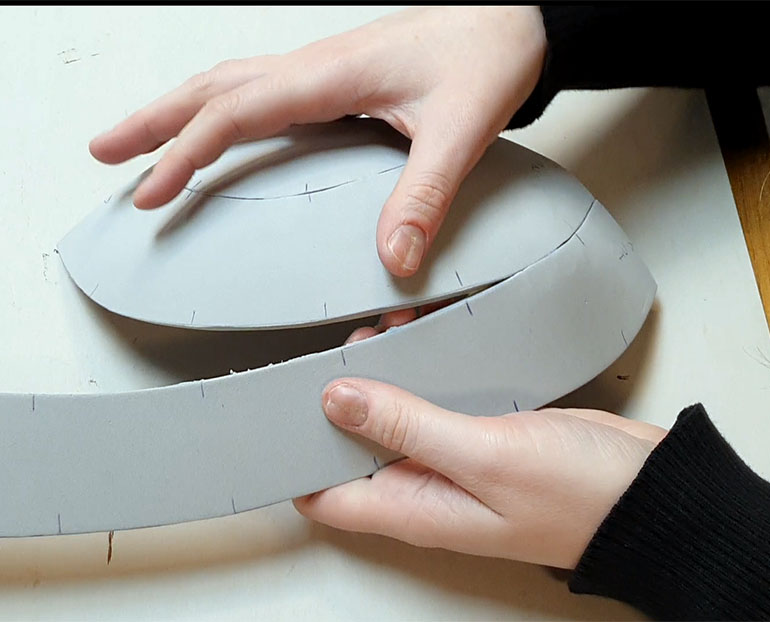
When you have all the pattern pieces cut out of the EVA foam, then it’s time to assemble the helmet! The best glue for EVA foam is contact glue (also known as contact cement). I love to use the Duracoll contact glue from Minque.
Apply a thin layer of contact glue to the edges of the foam pieces, wait for some minutes to let the glue dry a bit and then press the pieces firmly together.
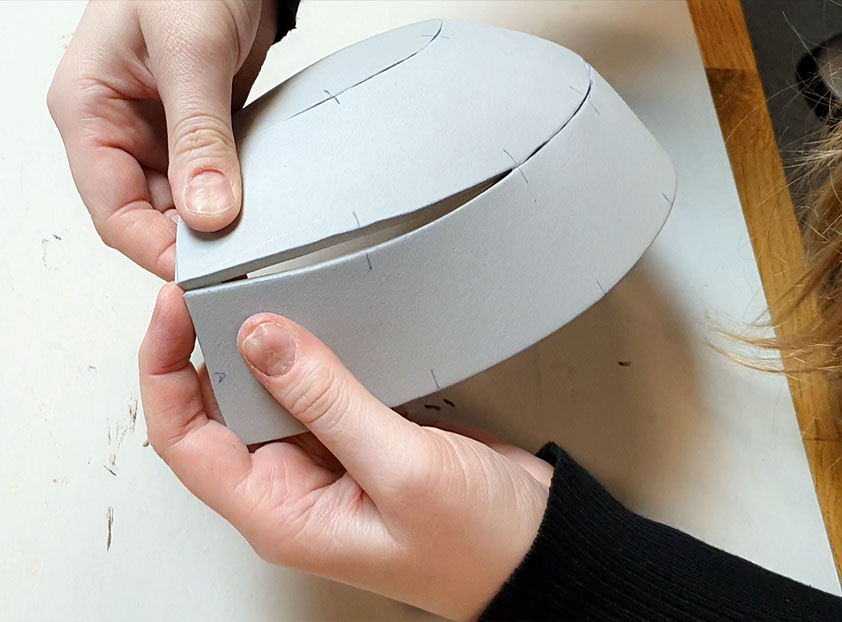
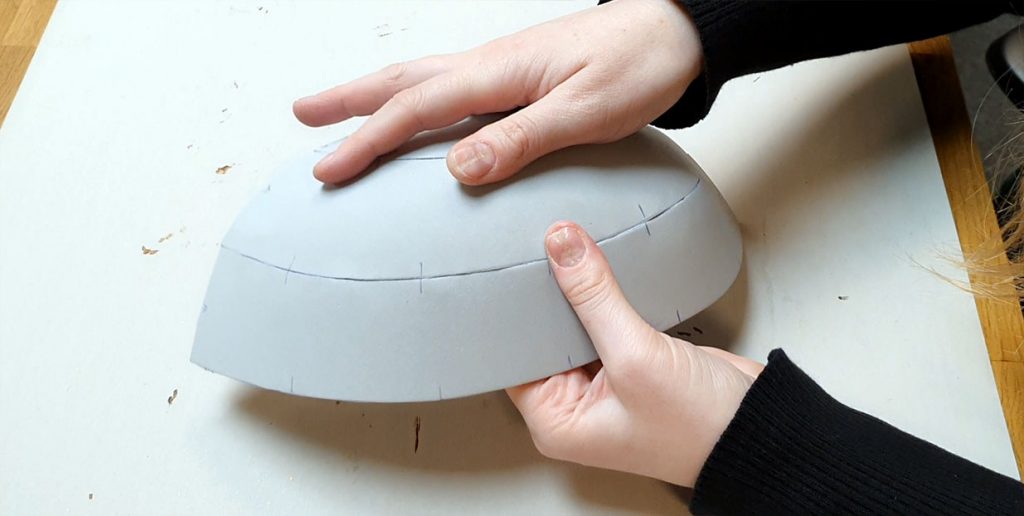
Build on to the base shape of the helmet
When you finish the base shape of the helmet, the real fun can start. You can add visors, nape guards, nose guards, plumes, etc. In the pattern set you can find many of those things! There are some examples in the pattern, but you can also start mixing and matching the pattern pieces yourself to create even more original helmet shapes. I really would love to see what you will create!
Awesome helmets, crafted with EVA foam
And now you have your awesome helmet, created with EVA foam. Of course you can add as many details as you want to make it even cooler! And… battle damage of course… So cool 😀
Want to learn more about working with EVA foam?
If you want to learn more about working with EVA foam, I have just the perfect book for you. My ‘Ultimate Guide to Foam’, in which I describe EVERYTHING I know about EVA foam. Really, I can recommend it 😉 Both as an E-book and as a physical (signed!) copy.
-
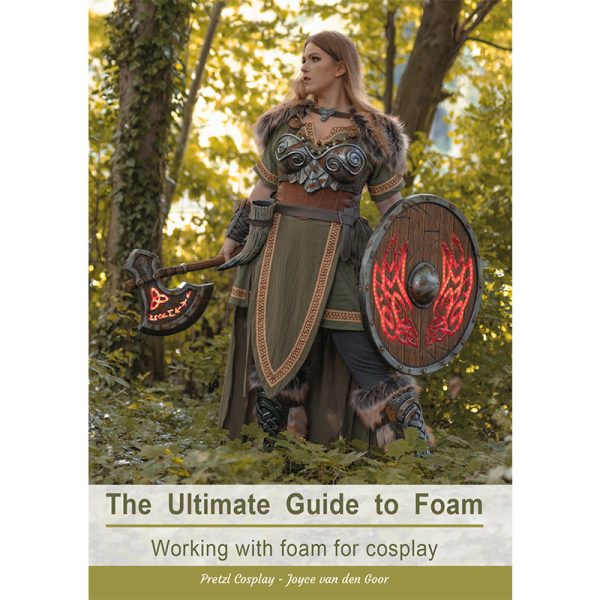 The Ultimate Guide to Foam – Print version and/or PDFPrice range: €7.50 through €24.95
If you use my patterns and post your progress and results on social media like Instagram and Facebook, use the #Pretzlcosplay hashtag and tag me @Pretzlcosplay so I can see your work and share it!
Note: The patterns in this collection are base templates of different styles of helmets for cosplay or LARP that you can use for crafting with either EVA foam or Worbla. You can use them exactly as they are, or add your own decorations and details to make them extra cool! These patterns will be a staple in your cosplay toolbox and you’ll be able to get back to them everytime you start a new costume.


Hoi! Ik wil een ridder helm maken voor mijn zoontje van bijna 5. Heb je nog adviezen voor het schalen van het patroon?